
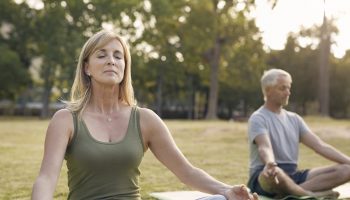
Have you just hurt your back and don’t know how to proceed? Yoga therapist explains why working with back injury with yoga therapy is different, and more effective than other modalities you may have tried. Following the steps below, you can move from the first stage of pain and injury, right through to full, pain free functionality!
Contents
Uttanasana or Standing Forward Fold
This pose helps to bring length to the back line of the body. It is an excellent posture to lengthen the hamstrings, but it also has the potential to strain the lower back if not done correctly.
While a slight rounding of the back is fine, you want to maintain integrity of the spine. You can modify your Uttanasana by placing hands on the shin bones, or hands on one or two yoga block(s). Doing so helps to bring space into the spine whilst forward bending.
Paschimottanasana or Seated Forward Bend
Paschimottanasana is a seated forward fold that stretches the spine and hamstrings, and is typically used at the end of a practice. Like Uttanasana, there is risk of straining the lower back when it is done forcefully and without awareness of creating space.
Twisting Postures
Any twist postures (e.g., Pavritta Parsvakonasana, Ardha Matsyendrasana, etc.) should be practiced mindfully with an intention to lengthen the spine on an inhale, and twisting on the exhale with the navel drawing inwards.
Drawing the navel inwards creates core engagement, supporting the spine as it twists, minimizing the potential for injury. Students who have existing disc issues in their lower back are advised to stay away from deep twists, or to work closely with an experienced yoga instructor.
Anjaneyasana or Low Lunge Pose
The psoas is an important flexor that runs from the front of the spine and attaches to the head of the thigh bone. As a result of long periods of sitting, the psoas shortens or tightens, which then puts strain on the lower back.
If we open up the psoas, we also help bring greater freedom into the lower back, minimizing the risk of injury. Anjaneyasana or Low Lunge pose helps to stretch the hip flexors, including the psoas.
Ardha Hanumanasana or Half Splits Pose
The hamstrings run along the back of each thigh and when tight can, not only keep you from touching your toes, but also limit motion in the pelvis which can create stress across the lower back. Ardha Hanumanasana or half monkey pose/half splits is a fairly accessible posture that stretches the hamstrings and also lengthens the spine.
From Anjaneyasana, lower the hands to the mat and frame the front foot. Shift the pelvis back, so the back leg knee is below the hip, and the front leg is straight. Hands on the mat below the shoulders (or blocks, if needed). Inhale to lengthen the spine, and keep the sternum lifted as you draw forward over the front thigh. Hold for 5 to 10 breaths and repeat on the other side.
The Yoga Pose that Healed my Lower Back Injuries
Rabbit, the sasangasana, is a hard pose, one that puts pressure on the neck and constricts the throat, making it hard to breathe. It’s my favorite asana though. Well to be accurate, not really my favorite, easiest or most fun, but favorite because of how it’s healed my back.
Growing up, I had injuries from trampolines, diving, weightlifting and falling from a roof. These resulted in lower back pain. Yet through the years, I found ways to get past that stabbing sensation in my lower spine close to my tailbone. On rare occasions, if I twisted the wrong way while grabbing a bag of groceries from the back seat of my car, a lightning bolt of nerve pain shot up my back taking me to the ground.
For years, my back aggravated me and compromised my activities. To motorcycle long distances, I added a lower back support and took aspirin.
But with yoga practice, the rabbit has since fixed my back and I am in debt to my adopted bunny.
Most Common Yoga Injuries and How to Avoid Them
While most yoga injuries aren’t severe and go unreported, more serious issues do occur, including strains and sprains, fractures, dislocations, and, in rare cases, bone spurs, sciatic nerve damage, and stroke. But according to yoga experts, injuries can happen any time, in any sport, or even walking down the sidewalk — and scary injuries are rare. Most yoga injuries develop gradually over years of consistent over-stretching and misalignment. As with any physical activity, the safest approach to yoga is to learn how to practice the poses correctly and stay in tune with your body to avoid overdoing it.
Wrists
When it comes to the wrists, it’s all about leverage. Placing all of the body’s weight in the wrists when the hands are on the mat can lead to muscle and joint injuries.
Find relief
When in doubt, spread ‘em. In any pose where weight is placed on the hands (such as down dog), distribute the body’s weight through both hands by spreading them wide and pressing through the fingers. In down dog, push the hips back to decrease the angle of the wrists to the floor. In arm balances, such as crow pose, look to see that the elbows are stacked directly over the wrists, Cheng says.
Elbows
Joint pain in the elbows can result from bending them out to the sides in poses like chaturanga. While it may be easier to execute, lowering down with outward-pointing elbows can stress the joint and can also put undue stresses on the wrists.
Tuck and lower
When bending the elbows in a pose (particularly plank or chaturanga), keep the elbows tucked alongside the ribs as you bend them, and make sure the elbows’ creases face forward, Cheng says. If this is difficult (yes, it’s a serious test of triceps strength!), begin with the knees on the floor. Remember, you can always work up to the unmodified version through regular practice.
Shoulders
Beware the shrug. By raising the shoulders up toward the ears (like when moving into up dog), yogis stop using the supporting muscles in the arms, shoulders, and neck. Shrugging also compresses the shoulders, which can cause muscle injuries, Cheng says. Even worse: It’s easy to injure the shoulder girdle or rotator cuff (and even dislocate the joint) by over-extending or over-stretching.
Let go
Be careful not to pull too hard on the shoulders in stretches, and always keep the shoulders held back and down away from the ears, yoga teacher and personal trainer Jeni Livingston says.
Ribs
Twists are awesome for releasing tension, but if done improperly they can overextend or bruise the intercostal muscles (the muscles in between the ribs).
Twist, don’t shout
Lengthen upwards through the spine before twisting. Imagine that someone has a string attached to the crown of your head and is very gently pulling you up toward the ceiling. Twist to the point of feeling a stretch but not past it, even if you’re flexible, Cheng says.
Lower back
Lower back pain is the most frequently cited yoga injury, and teachers speculate that it’s likely the result of rounding through the spine in poses like forward folds and down dog. Rounding causes the spine to flex the opposite way that it’s supposed to, Livingston says, which can cause disc problems in addition to that achy feeling post-class.
Soothe the spine
Before bending, imagine lengthening the spine up and away from the hips to avoid rounding. Still struggling to stay on the straight and narrow? Try bending the knees in poses like forward folds and down dog, Livingston says, since the culprit could be tight hamstrings. During seated forward folds, try sitting on a blanket or block to take pressure off the lower back.
Hamstrings
Spend most days sitting in front of the computer, in class, or in the car? Guilty as charged. As a result, many of us have tight hamstrings, so it’s easy to pull or over-stretch them in poses like forward bends, Cheng says.
Hamper pain
Down dog and lunges are great ways to stretch the hamstrings (just remember to go slowly and work at your own pace). If you have any kind of hamstring injury, try laying off poses that extend through the back of the body and legs until the injury heals.
Hips
It’s easy to over-extend the hips’ range of motion in splits, warrior poses, and wide-legged forward folds, Cheng says, which might tear the muscles of the inner groin or inner thighs.
Get hip (to proper form): A good rule of thumb is to make sure that the toes are pointed forward in any pose where the hips are squared off in the same direction (think: warrior I). Imagine there are headlights attached to the front of the hips and that you’re trying to keep the area straight ahead of you illuminated at all times.
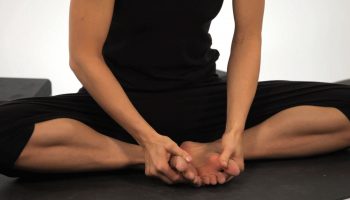
Knee
Knee issues can plague even experienced yogis well after class. A common culprit of pain is the cross-legged position, Livingston says. Flexibility carries from the hips first; if the hips are tight in the pose, the knees will be the first place to feel pain or tension.
Prevent the pain
For those regularly bothered by knee pain, avoid sitting in cross-legged position or full lotus for long periods unless the hips are already very flexible, Livingston says. Placing a block or rolled-up blanket under the knees in cross-legged positions can also help reduce strain. Any time the knee is bent in a standing pose (such as warriors I and II), look to see that there’s a vertical line from the bent knee to the heel, Cheng says — this ensures that the body is bearing weight properly.
Neck
Head and shoulder stands can be the worst culprits for neck pain and injury, says yoga teacher Julie Skaarup. Repeatedly and incorrectly placing pressure on the neck in poses such as shoulder stand and headstand can compress the neck and put pressure on the cervical vertebrae, resulting in joint issues and, in some cases, loss of neck flexion.
Prop it up
Have chronic neck or shoulder issues? It might be best to avoid full inversions all together, Cheng says (or attempt them only with close supervision and using props that elevate the neck away from the floor). For those who already practice the pose without props, make sure the shoulder blades are drawn down and back so they’re safely supporting the body. Most importantly, never jerk the head once you’re up in the pose, Skaarup says, because it can destabilize the body, possibly causing a fall.

