Benefits

Yoga for Menstruation – What To Avoid And the Best Poses to do

yoga_menstruation

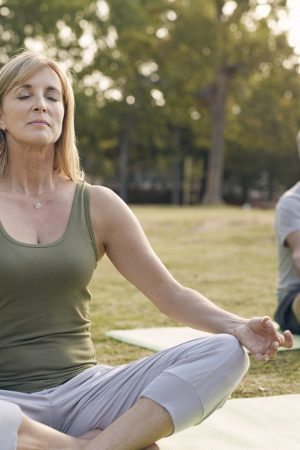
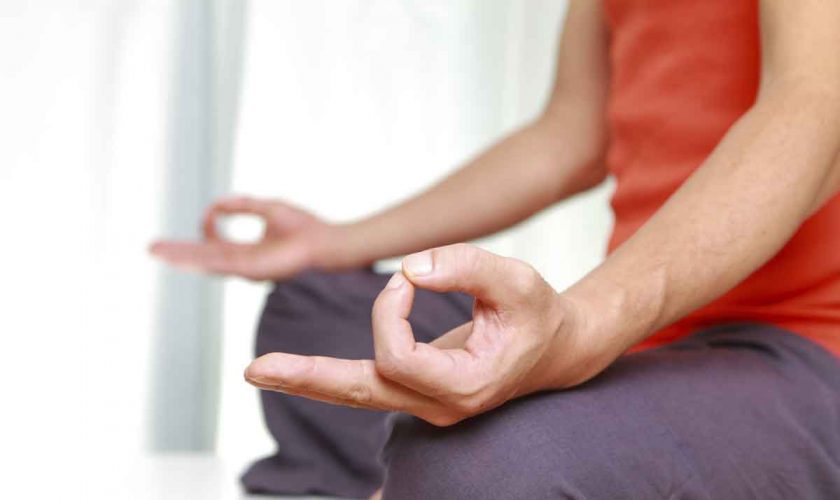
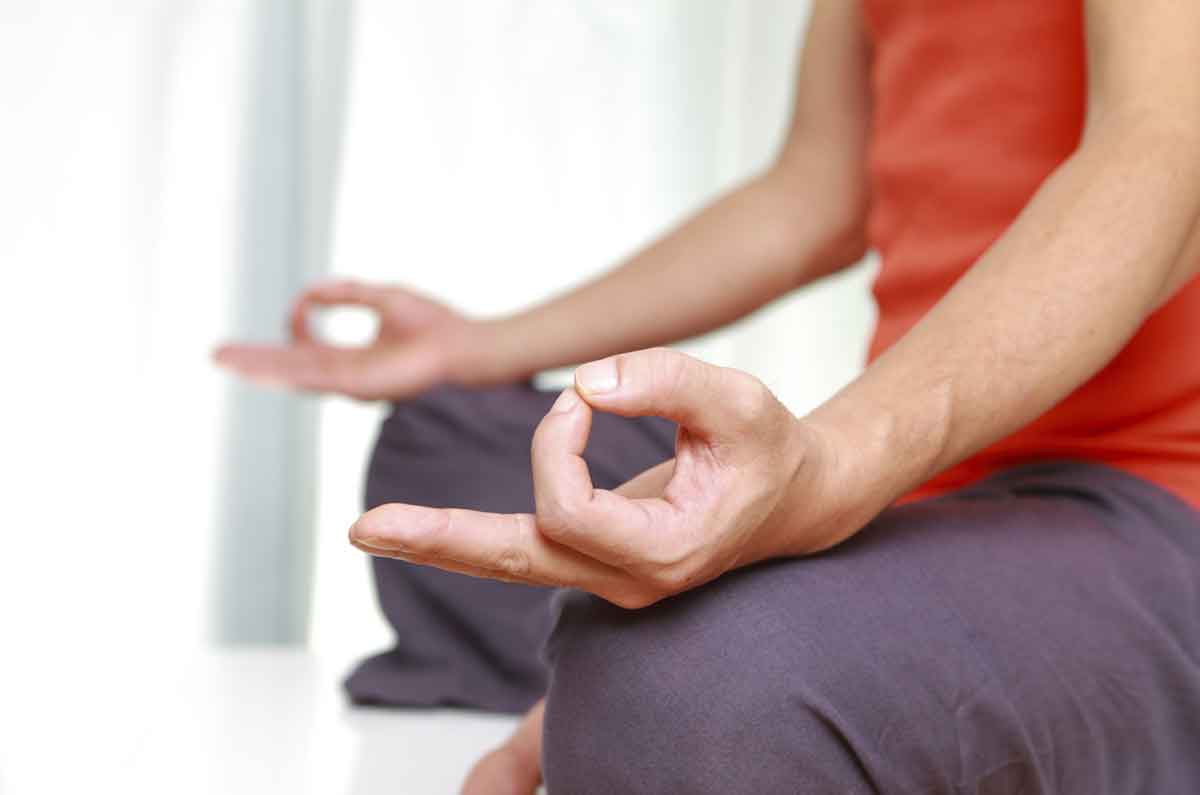
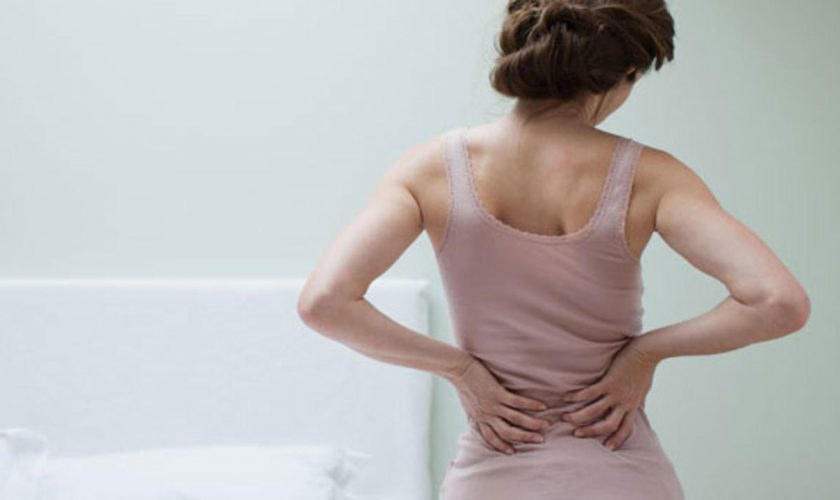
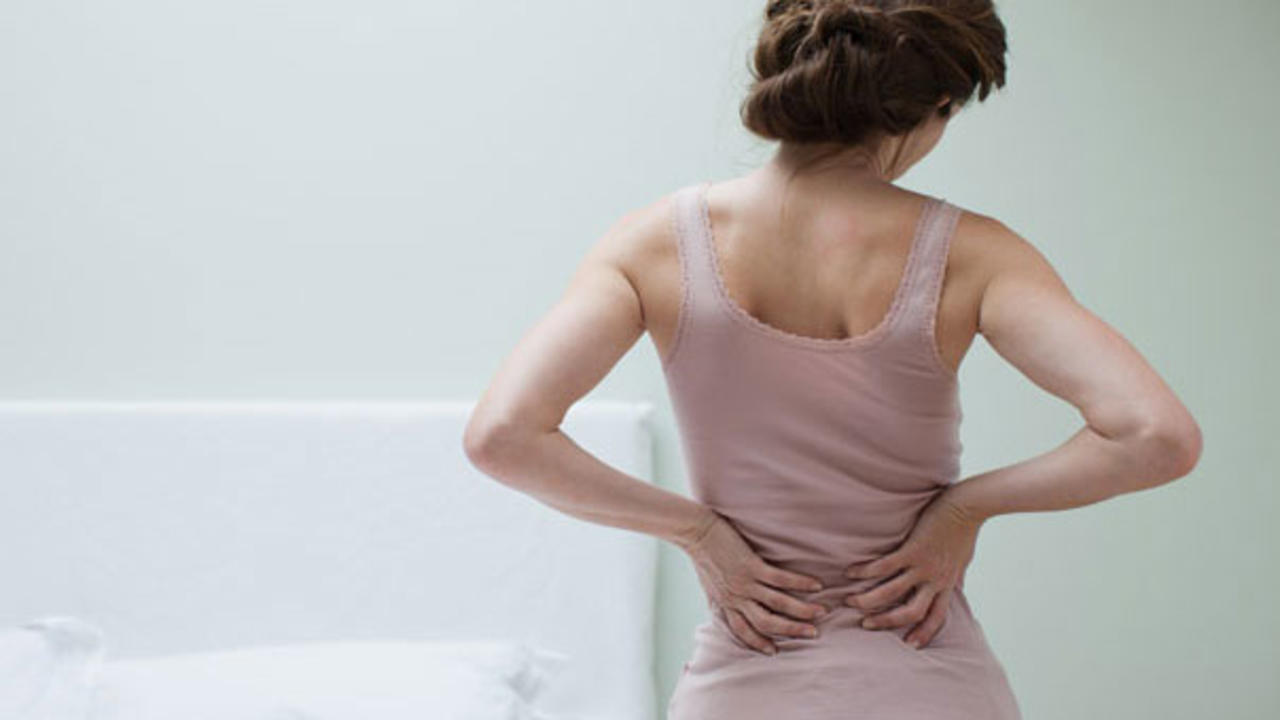
That time of the month often comes with some uncomfortable, inconvenient, and painful effects. With over eighty percent of women suffering from period-related pain at some point in their lives, it’s important to understand how to treat cramping holistically.

Yoga has proven to be a helpful tool in managing these negative effects associated with menstruation; so instead of self-medicating or just skipping out on everyday activities, you can turn to yoga to soothe aches and pains.


7 yoga poses to avoid when you’re on your period

When you’re on your period, chances are the last thing you want to do is drag your bloated, lethargic body to a yoga class and get bendy whilst holding your period farts in and worrying that you’re blobbing through your yoga pants.

So here are seven poses you might want might to keep a beady little eye on during your time of the month.


Handstand

As well as being an inversion, handstand is a powerful asana, which you just might not have the energy for during your period.


Headstand

If the rest of the class are trying to jump into headstand and you just want to jump into bed, try supta baddha konasana, where you lie on your back with the soles of your feet together.


Shoulderstand

Try legs up the wall instead – all the benefits of draining the blood from your legs without lifting your pelvis and pissing off your uterus.


Plow pose

Inverting can make the blood vessels in your uterus swell, causing you to bleed more. And nobody wants that.


Scorpion pose

As well as sending your blood the wrong way, scorpion can put an awful lot of pressure on your back, which might not be ideal if you get back pain during your time of the month. And probably won’t have you laughing like this lady.


Crow pose

Crow requires the activation of uddiyana bandha (your abdominal lock) which can increase heat in the body, leading to more bleeding. Not ideal. Unless you love throwing money at tampon manufacturers.

Bow pose

Bow can actually be really useful in getting rid of that pesky period bloat , but it can also increase pressure on your back, so go easy with this if you get a sore back during your period.

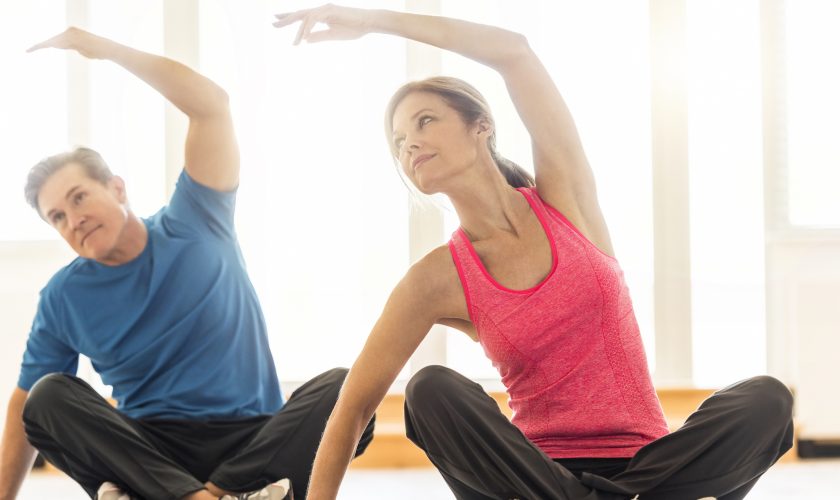
Yoga Poses to Relieve Menstrual Cramps

Along with breath work, the poses below will help clear the mind while relieving pain and discomfort. These poses are considered Yin Yoga postures and when completed in Yin fashion (i.e., holding passive poses for 3-5 minutes), the benefits are enhanced through a deep stretch while getting in touch with the sensations of the body and mind.

So without further ado, here are 6 yoga poses to relieve menstrual cramps AND help soothe your mind.


Child’s Pose

Child’s pose is the go-to resting pose in most active yoga classes. With many benefits, the pose is a great option for those suffering from menstrual pain originating in the back. By gently stretching the low back muscles, Child’s pose will soothe back aches while also quieting the mind.


Forward Fold

Counteracting compression, Standing Forward Fold pose lengthens the spine and stretches the hips. It also help ease the pain that radiates down the legs and around the back by stretching the hamstrings, calves, and back.


Knees-to-Chest Pose

One of the most effective poses for menstrual pain is the Knees-to-Chest pose. This feel-good posture relaxes the lower back and abdominal muscles, relieving tension and reducing pain. Knees-to-Chest pose also increases circulation to the abdomen, aids the internal organs, softens the mind, and reduces anxiety.


Supine Twist

Twists are believed to stimulate, detox, and refresh the inner organs by “wringing out” the body. Holding a Reclined Spinal Twist for a few minutes while tuning into the breath will help ease the nerves during menstruation, as well as any accompanying abdominal pain.

Cat/Cow

More active than the previous poses, moving slowly through the Cat-Cow pose will warm up the body, which is known to relieve menstrual cramps. In addition, these poses target the back and abdominal muscles—stretching and toning them. This gentle flow will also help with coordination and emotional balance that may be altered during the menstrual cycle.
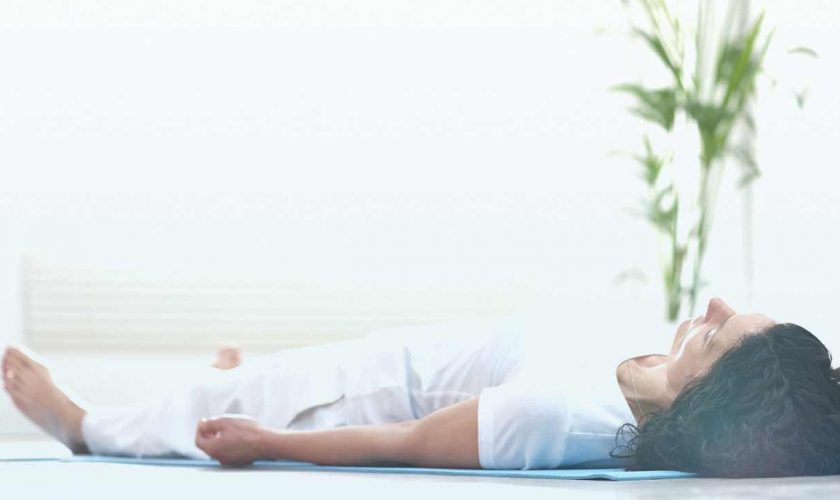
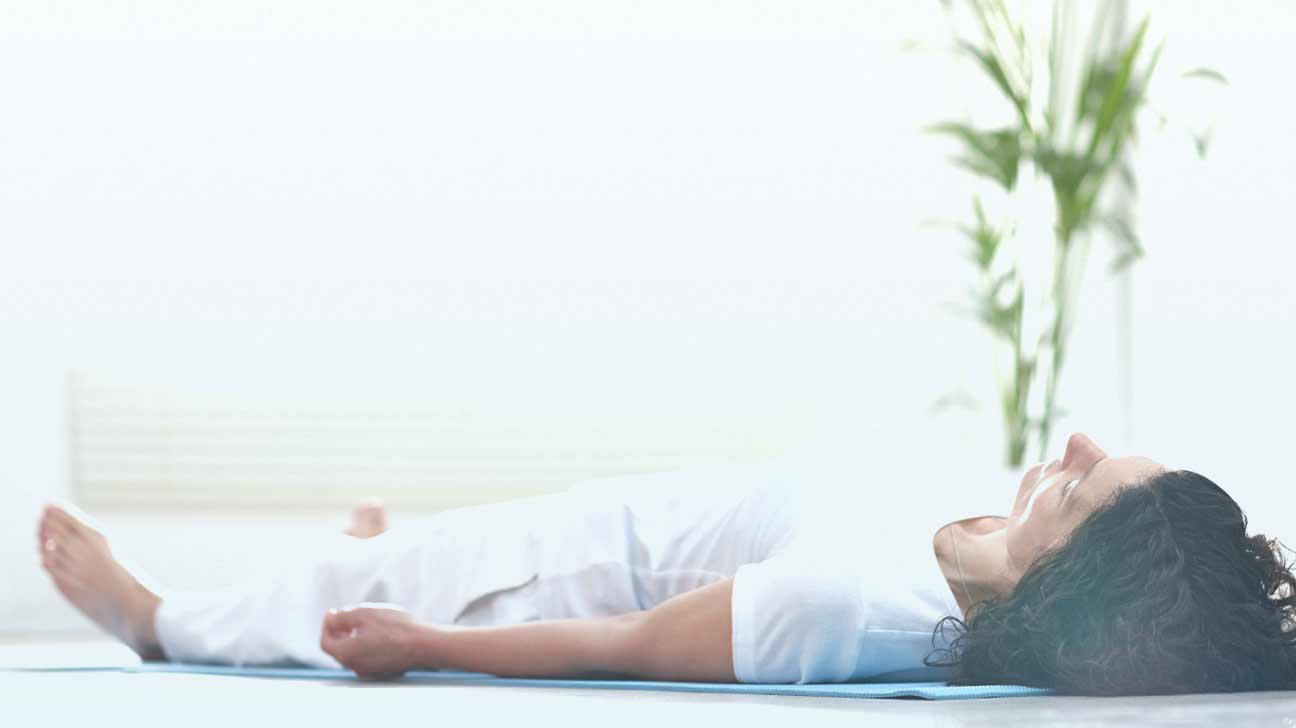
Savasana

The final resting pose that usually denotes completion of a yoga class is Savasana, also known as Corpse pose. This simple supine posture requires very little effort but reaps a handful of benefits.

Continue Reading

Best Yoga Poses for Low Blood Pressure (Hypotension)

yoga low blood pressure

Low blood pressure or hypotension is a physical condition, where the blood pressure levels fall below 90/60 mm Hg. Doctors believe that low blood pressure is not really harmful, until it starts causing dizziness, fainting and even shock. Some other symptoms of hypotension include headache, chest pain, seizures, prolonged diarrhoea and vomiting.

Low blood pressure can be caused due to various reasons such as low blood volume, anaemia, nutritional deficiency, heart problems, and hormonal changes, amongst others. In advanced cases, it may lead to lack of oxygen supply and nutrients to the brain, and other vital organs.

Although hypotension is not as dangerous as high blood pressure (hypertension), practising certain precautions, and making some lifestyle alterations, can help you stay out of danger. Proper care and medication can bring your blood pressure level back to normal. Regular practice of physical exercises, like yoga , can improve blood flow in the body, and thus, alleviate low blood pressure. Additionally, a balanced ayurvedic diet can ease and speed up the process of normalising the blood pressure level.

Yoga improves circulation, so it can be very beneficial for people with low blood pressure. There are some things to keep in mind when guiding students with low blood pressure.

Keep transitions slow and gentle when leading students who have low blood pressure. You might want to add in some cues as well to encourage them to make the transitions (for example from forward fold to mountain) even slower. Talk about how to modify for low blood pressure.

Matsyasana or fish pose

Low blood pressure can be a symptom of an underlying problem such as dehydration that can lead to other severe conditions such as heart failure. It is, therefore, important that you practice yoga postures such as matsyasana to improve your overall health.


Padma sarvangasana or lotus shoulder stand

Twisting in padma sarvangasana can improve the flow of blood to the brain and also stimulate the pituitary and thyroid glands. The result is a refreshed body and an energised mind.


Ustrasana or camel pose

Practising backbends such as ustrasana will increase the flow of blood to your brain along with calming your nervous system and toning your spine.

Uttanasana or intense forward-bending pose

Forward bending postures such as uttanasana can improve blood flow to the brain, thyroid and pituitary glands, controlling blood pressure levels.


Adjustments for the practice

  • Slow transitions between poses, especially from the position where the head-level is lower than the heard-level; from bending down, sitting, lying down to standing position;
  • Slow reposition of the head;
  • Take additional breaths between transactions;
  • Slower yoga styles (e.g. hatha instead of Vinyasa style flows) may be more suitable for people with hypotension.
Continue Reading

Stretch The Knees – Best Yoga Poses for Knee Injury

yoga_knee_injury

The best thing you can do for your knees is to strengthen the surrounding tissues, specifically the inner thighs. Our knees are naturally an unstable place as they sit between a wide joint (the hip) and a tiny joint (the ankle) putting the kneecap at an angle.

To combat and prevent knee pain, you can work on strengthening the interior thighs to align the patella and strengthen the ligaments using yoga postures like the Warrior Poses and Triangle. But the very first thing you will need to do is to realign all your basic postures using these three cues in every pose.


Best Yoga Poses for Bad Knees

That being said, there are several specific poses that can help provide relief—and a few that can be problematic if practiced incorrectly. That’s why it’s always best to find an experienced teacher you trust and let them guide you. Also be sure to let your teacher know about any injuries or concerns before class, says Steven Cheng, a certified yoga instructor and Greatist expert. Finally, remember: “If a pose doesn’t feel good, causes pain, or gives you a sharp sensation in the patella (kneecap), adjust it or don’t do it,” Miller says.


Chair Pose

Standing with feet and legs together and chest lifted, sit back and down (as if you were sitting in a chair). Keep weight in heels and raise arms up through fingers.


Peaceful Warrior

Step right foot forward with toes pointing straight, left toes turned 90 degrees to the side, arms out and palms facing up. Bend right knee in a lunge. Place back of left hand on left leg and arch back, reaching right arm overhead and toward back wall, gazing toward ceiling.


Bridge Pose

Lie faceup. Bend knees and place feet on the ground shoulder-width apart, arms down at your sides. Squeeze glutes and push through heels to lift body off the ground, resting on just shoulders.


High Lunge

Standing at the front of the mat, step the left foot back in a deep lunge, bending the right leg to about 90 degrees. Raise arms straight up and look forward. If your hamstrings are tight, micro-bend the back leg—this is also less taxing on the knees.


Eagle Pose

In a standing position, bend the knees and wrap the right leg over the left, balancing only on the left foot. Wrap thighs tightly on top of each other with no space in between. You can wrap your arms the same way (right over left), or simplify with hands in prayer position. (Note: If thighs cannot make full contact, leaving some space is OK, but make sure the effort is still toward wrapping one thigh over the other. If you have trouble balancing, use a wall or chair to support.)


Yoga Poses to Stretch The Knees

It’s important to not only strengthen the knees but also to stretch them. You can make knee injuries worse if the muscles are so tight that they decrease movement fluidity. Here are 3 poses that stretch the knees and the supporting muscles without causing pain. Again keep in mind that each person is different and very few injuries are exactly the same, so make sure to seek advice from your physician before beginning.


Wide-Angled Seated Forward Bend (Upavistha Konasana)

Many of the poses that stretch your legs and hips tend to torque the knee in a way that can be quite painful for those who have knee weakness and pain. Konasana is a great pose that will stretch out the whole back of the body as well as the hips, inner thighs, and groin. To get into this pose, straddle your legs out in the widest stance you can comfortably place them.


Easy Pose (Sukhasana)

Lotus is a common pose that that is held at the beginning and end of each yoga class and can be a real pain in the knee. So, instead of sitting with both feet in the crooks of your thighs, simply cross your legs and gently place one in front of the other. Keep in mind that the deeper the bend in the knee the higher the chance of pain, so you may not have a perfect crossed leg look.


Child’s Pose (Balasana)

This is a gentle knee stretch that can be intensified the closer you can move your bottom toward your heels. Props are necessary for those with tight, sore knees. Start on your hands and knees (with a blanket under the knees for protection). In the full, unmodified, pose you’d have your feet together with your toes untucked, knees separated so the belly can rest between the thighs, bottom sitting on the heels, and forehead on the mat with the arms extended out.

Continue Reading

Yoga Poses For Insomnia – Deep Relaxation Help You Sleep Better

yoga_insomnia

According to a recent Huffington Post survey, sleep deprivation is a major source of stress among U.S. adults.

Whether you’re a night owl with early bird aspirations, a troubled sleeper, or just in need of a little help relaxing before bedtime, some gentle yoga before you tuck in can help. This in-bed routine (really, you can do these moves in your bed) will put your body and mind to rest, helping you sleep soundly through the night to wake up rested and refreshed in the morning. No pills required.

That’s where yoga comes in. By lowering stress levels, calming the mind and relieving tension in the body, the soothing practice can be an effective natural sleep remedy. Certain resting and inversion poses can be particularly helpful for combatting restlessness and insomnia, especially when practiced in the evening or in bed before hitting the hay.

“We live in such a fast-paced environment and our senses are always being stimulated, and that affects our nervous system,” says Vyda Bielkus, a yoga teacher and trainer and founder of Health Yoga Life. “The yogic technique of focusing on your breath can be helpful — the exhalation stimulates the nervous system to release … [and] the poses also help us relieve tension from the physical body.”

Insomnia may be common, but if left untreated its health consequences can be anything but benign. Chronic insomnia is associated with a number of serious medical conditions.

Insomnia is associated with high blood pressure and other cardiovascular problems. This large-scale study found that people with insomnia had significantly elevated risk of heart attack. Insomnia is also associated with inflammation in the body, which is itself a risk factor for heart problems and other serious illnesses.

Research indicates that lack of sleep can have negative effects on cognition, and the brain. This study linked insomnia with destruction of gray matter in the brain. This group of four studies, conducted independently of one another, found evidence that poor and fragmented sleep may contribute to impaired cognition as we age.

Insomnia has been found linked to both anxiety and depression. The relationship between sleeplessness and these mental health disorders is still being understood, including whether one condition precipitates the other. But insomnia, depression and anxiety share a deep and difficult connection.

Lack of sleep, and disrupted sleep, is also associated with obesity. We’ve seen extensive research that shows under-sleeping is linked to weight gain and the diseases associated with obesity.


Short Meditation

First things first: Get ready for bed. Put your pajamas on. Turn off the lights—and the TV and computer. Put down your book and get comfortable. Sit in a cross-legged seated position in bed. Then lean back slightly onto your pillows or headboard.


Seated Twist

Still in your cross-legged seated position, inhale and sit up tall. Then exhale as you twist your torso to the left. If you have a headboard, you can grab onto that for some gentle leverage in your twist.


Cross-Legged Bend

Still in your cross-legged seated position, gently bend forward from your hips and reach your hands straight out in front of you on the bed. Stay here for a few deep breaths, feeling the stretch in your hips and back.


Seated Forward Bend

Slowly extend your legs out in front of you, keeping your knees slightly bent. Inhale and sit up tall. Then exhale and reach for your feet. Bend your knees as much as necessary to keep your back flat.


Knees-to-Chest Pose

Slowly roll down to lie on your back and rest your head on your pillow. Hug one knee into your chest, grabbing your shin to pull it closer to you. Stay here for a few deep breaths.


Reclining Big-Toe Hold

Inhale and extend right leg straight up to the ceiling, grabbing hold wherever you can comfortably reach (behind your knee, closer to your ankle, or your big toe if you’re very flexible).

Continue Reading

Yoga Poses and Exercises for High Blood Pressure

yoga_high_blood_pressure

yoga poses for high blood pressure

Yoga can actually help with three of these lifestyle changes: exercise, maintaining a healthy weight, and stress reduction.

Be aware that some standing poses, back bends, and inversions should be avoided if you have hypertension. Check with your doctor before starting yoga, and talk with your yoga instructor to be sure the specific poses in class are safe for you.


Yoga Breathing Exercises for High Blood Pressure

Can yogic breathing exercises and Pranayama help to reduce blood pressure? There is a lot of evidence suggesting that yes; breathing exercises can be another helpful tool to lower blood pressure naturally.

Deep breathing for high blood pressure works by calming your sympathetic nervous system and increasing blood flow to your tissues-particularly to your heart as your diaphragm moves up and down.

One study demonstrated that taking 6 deep breaths in half a minute reduced systolic blood pressure by over 3.4 units when compared to those sitting quietly.

Utilizing yoga for high blood pressure is most useful if done as part of a multi-theraputic approach, including lifestyle changes and Ayurvedic remedies for stress and high blood pressure.

As always, when it comes to natural healing, getting results are not usually as quick and easy as popping a pill. The good news is, however, that when you take steps to lower blood pressure naturally by helping the body’s own healing response to take care of the problem, you get true, holistic healing.

As your nervous system becomes more balanced, your whole mind and body system benefits. This means you, generally speaking, will feel better, have more energy, will perform better during the day, and have more resources for coping with stress.


Adho Mukha Shvanasana (Downward-Facing Dog Pose) with Support

Begin on your hands and knees and place two or three blankets (folded lengthwise) underneath your chest. Press the weight evenly through the hands as you straighten your arms and lift up through the inner edges of the arms. Release your shoulder blades away from your neck toward your hips, straighten the legs, and lift your pelvis up into adho mukha svanasana (downward-facing dog pose). Separate your feet wider than hip-width apart.


Uttanasana (Standing Forward Bend Pose) with Head Support

Separate the feet as wide apart as the narrow side of a yoga mat. Align the outer heels and little toes on the edges of the mat, and place a block at its tallest height between your feet and in line with your big toes. Depending on your proportions and the flexibility of your hamstrings, you may need more or less support. Stack a couple of blocks, if necessary, or put the blocks or a folded blanket on the seat of a chair to rest your head.


Pashchimottanasana (Posterior Stretch Pose)

Sit on two folded blankets and extend your legs straight in front of you in dandasana (seated staff pose), feet hip-width apart. Place a bolster lengthwise on top of your legs, with a folded blanket on the bolster closer to your feet. Lift the sides of your torso up. If you find that you’re slumping backward, sit on more support. Extend forward and hold the outside edges of your feet with your hands. Lengthen your abdomen over the bolster and rest your forehead on the blanket.


Halasana (Plow Pose)

Experiment with this pose using blankets, a bolster, and a chair for support. If you feel any discomfort, simply come out of the pose and rest in shavasana. Stack three folded blankets at the end of your mat. The smooth, folded edges of the blankets should be in line with the edge of your mat. Open another blanket on the floor in front of your mat for the back of your head, place a bolster on the mat behind your blankets for your pelvis to rest on, and position a chair on the floor in front of your mat and folded blankets. Lie down with your shoulders, upper back, and base of your neck on the stacked blankets, your head on the blanket on the floor, and your pelvis resting on the bolster.

Continue Reading

Yoga Poses for yoga for Healthy Heart – Yoga for Health

yoga for heart health

yoga for heart health

According to the CDC (Center for Disease Control and Prevention), about 600,000 people die from heart disease in the United States every year. High blood pressure, high cholesterol and smoking are key causes of heart disease. Increased blood pressure and cholesterol levels result from stress, anxiety, poor diet and lack of physical activity. The American Heart Association says healthy eating, exercise and meditation are recommended lifestyle choices to prevent and reverse heart disease.


How to Cure heart disease by yoga

There are different types of heart disease and different types of symptoms but only one solution on heart disease is Pranayama. Yes it is true and there are so many people are experiencing benefits of pranayama and yogasana.


Food Habits

Suitable

Normal Food with Less Fats & Carbohydrates but with High Fibres. Best food is Fruits & Vegetables.


Avoid

Non-veg Food, Milk & Milk Products (Skimmed milk can be taken), Rice, Oily & Spicy Food, Refined Foods, Fast Food, Preserved Food, Salts.


Seven pranayama for heart patients.

  1. Bhastrika Pranayama
  2. Kapalbhati Pranayama
  3. Bahya pranayama
  4. Anulom Vilom Pranayama and Nadi Shodhan
  5. Bhramari Pranayama
  6. Udggeth Pranayama
  7. Pranav Pranayama


Yoga poses for heart patients.

  • Uttanapadasana
  • Pavanamuktasana
  • Shavasana


Pranayama is the breathing technique which

  • Remove the negative energy, toxins from our body and gives positive energy.
  • Pranayama improves the blood circulation, which is very important for the heart to pump properly.
  • Pranayama calms the mind
  • Cures anxiety and depression.
  • Pranayama releases stress and depression.
  • Remove artery blockages.


Yoga helps beat stress

When you encounter a stressful situation, the brain releases adrenaline into your system to help you either fight or flee the threat. This causes your heart to beat faster and your blood pressure increases.  While this response can help you protect yourself when facing a threat, living in a constant state of stress may wreak havoc on your cardiovascular system. According to the Heart and Stroke Foundation, people who are prone to stress have a higher risk for heart disease than their calmer counterparts.


Yoga reduces inflammation

Inflammation is your body’s way of responding to injury and harmful situations, including stress. But it’s also “at the core of most pathologies, including heart disease,” says Dr. Hana Stastny, a medical doctor and yoga therapy instructor at Mount Royal University in Calgary.

Yoga may lower blood pressure

According to the Heart and Stroke Foundation, long-term high blood pressure can weaken your heart and damage blood vessel walls, causing plaque to build up and potentially narrow or block arteries. This is a leading cause of heart attack and stroke.


Yoga promotes physical activity

People who are physically inactive are twice as likely to be at risk for heart disease as those who do exercise, according to the Heart and Stroke Foundation. Yoga improves strength and flexibility, which contributes to cardiovascular health, says Stastny.

Continue Reading

Yoga Poses for Headaches – Get Rid of Migraine and Headaches

yoga_headache

yoga poses for headaches

When you feel a headache coming on, suddenly the only thing that matters is relieving that tension — and fast. But if you’re looking for a solution outside of a pill bottle, consider trying a yogic breathing exercise or a soothing spinal twist. With the ability to help relieve tension, boost circulation, and calm the mind, yoga can be a powerful natural remedy for headaches.

“Yoga helps to release tension and stress in the body, and the majority of headaches are usually tension-related,” Lynn A. Anderson, Ph.D., doctor of naturopathy and certified yoga instructor, tells The Huffington Post. “Yoga gives the individual an opportunity to slow down and relax, and also really improves circulation throughout the body. Anytime you improve circulation, that improves pain and stress.”

Specific poses can help target some of the underlying causes of your headaches, like stress and tightness, according to Anderson.


First, nutrition is crucial in all healing. Long-term solutions to health always require you to make a change to your diet. Cut out all allergenic foods – gluten, refined or artificial sugar, soy, dairy.

Secondly, get plenty of good quality water (free of fluoride and chlorine). And take Magnesium.


Yoga Poses to Get Rid of Your Headache

Seated Neck Release

Since the neck is often the culprit of tension headaches, it’s important to stretch it out with a basic yoga exercise. All you need to do is sit in a comfortable position, ensuring that your spine is straight and your neck lengthened. Then place your left hand on the right side of your head and gently tilt your head to the left. Hold for a few breaths and then slowly switch sides. Repeat on both sides a few times to reduce the intensity of the headache. So when a headache looms, you know what to do.


Viparita Karani

Putting your ‘Legs Up The Wall’, gently stretches the muscles in your neck and relaxes you at the same time. It can in fact, ease your throbbing headache in just a few minutes. Sit on one end of a mat with your right hip touching a wall. Lean back, turn to lie flat on the mat, and extend your legs up the wall. Make sure your butt is nearly touching the wall and your legs are placed together. Put your hands on your belly or rest them on the mat, then close your eyes, relax your jaw and drop your chin slightly. For 3 to 10 minutes, breathe deeply and slowly in this position.


Adho Mukho Svanasana

Also known as the Downward Facing Dog Pose, this is one of yoga’s most widely recognised asanas. Take deep breaths while practicing this pose, and just let your head hang between your shoulders. This beginner-friendly asana helps get rid of fatigue, back pain and stiffness from sitting all day by stretching the hamstrings, chest and lengthens the spine. It helps provide additional blood flow to the head which can often be just the thing to relieve your headache, and leaves you feeling energized.


Happy Baby Pose

In case you think your headache might be stemmed from the pain in your back that’s radiating up your spine, or you just need to relax for a few minutes, try the Happy Baby Pose. This restorative post will indeed instill a sense of calmness. Lie on your back with your knees bent, holding on to your thighs or the outside edges of your feet. You can slowly rock from side to side to increase the stretch in your hips and lower back, and to gently lull your mind into a state of relaxation.


Uttanasana

Standing forward-fold is perhaps, one of the most basic ways to get rid of the pain. Nidhi Gureja, Art of Living, says, “Uttanasana invigorates the nervous system by increasing blood supply and also calms the mind”. So what do you need to do? With feet hip-width apart, bend forward, relaxing your head toward the floor. Grab opposite elbows, soften knees, and and just relax your head and neck completely.


Legs Up the Wall

Sit sideways next to a wall. Lie down on one side, facing away from the wall with butt touching it. Using arms, lift legs up the wall as you roll over onto your back. Allow arms to fall on either side of you. Palms can face up for openness or down for an extra level of grounding. Breathe here for at least 10 breaths.


Reclining Goddess

Place a bolster lengthwise behind your sitz bones and gently lie back so your upper back and head are supported by the bolster. Once comfortable, place feet together and knees apart (if this is uncomfortable for your hips, you can use two blocks or pillows to support your thighs), and allow arms to relax on either side. Breathe here for at least 10 deep breaths.

Continue Reading

Yoga Poses for Curing Diarrhea

yoga_poses_for_diarrhea

Being on the road a lot, eating street food and food in doggy restaurants I now and then suffer from diarrhea. Ever since a parasite devastated my intestines, I’m pretty vulnerable anyway. Luckily yoga helps, because there is yoga to cure diarrhea.

All the asanas (the yoga poses) are actually designed to heal our body. To realign us physically, but also the help our intestines function properly, to improve our respiratory system, to improve our heart, to cure us from old injuries, to let go of old emotions and old stress that is trapped in our body.

How yoga benefits digestive health

Yoga has demonstrable effects in alleviating and preventing digestive distress.  Yoga is perhaps most helpful for its ability to reduce the stress, anxiety, and the pain of chronic illness. Regular practice will indisputably improve your physical and mental fitness, promote relaxation, and give you a sense of control over your health and well-being. As with other stress management techniques, the more you practice, the more powerful the change.  Yoga gives relief from symptoms such as constipation, diarrhea, bloating, gas, and pain. Yoga is also tremendously beneficial for preventing or minimizing menstrual cramps, which often exacerbate digestive distress.

Constipation versus Diarrhea with Yoga Poses

It is important to note that there are different poses that are good for constipation/diarrhea.

All poses listed here are beneficial for constipation as they will help to get the stagnation of energy moving down in what is known as ‘apana vayu’. Master yogis suggest that if you suffer from constipation and do a daily forward folding practice for a week, you will see an immediate and marked increase in bowel activity.

They are each beneficial for diarrhea as well, as they promote consistancy, ease, and regularity.  But if you are in an active state of diarrhea, it is best not to practice intense forward folds (such as seated forward folds.) These poses will increase the downward flow of energy which might increase the flow of bowel activity.


Yoga Poses for Diarrhea

The practice of yoga will also depend on whether you have chronic digestive issues that leads to diarrhea or is it a one off thing. If the condition is chronic, then you need to check with your doctor before practicing yoga.  Often most poses in yoga come with contraindications. Contraindications are conditions in which the pose or the asana might not do its job as effectively. If the diarrhea is a one off thing, yoga or the practice of the poses will not affect it but if it is chronic, you should get your doctor’s approval.

In some instances, the type of yoga also acts as a deterrent. Bikram Yoga, for instance, is very rigorous and people with diarrhea shouldn’t practice it. This form of yoga tends to be exacting on the body and even under normal circumstances, sometimes the person could even develop diarrhea as a result of doing yoga. In such cases, therefore, it becomes important that people suffering from diarrhea do not try the newer forms of yoga.

These abdomen inverted postures slow bowl motility and promote fluid absorption. Add the hip opening and back bending poses if the condition is chronic. Avoid squatting poses and postures that compress the abdomen.

If you choose to do yoga with diarrhea, you need to start slow as a precaution. As you feel stronger you can increase the intensity of the workout. There are some of the poses that can be done to help cure diarrhea:

  • Reclining Bound Angle Pose
  • Reclining Leg, Foot and Toe Stretch
  • Headstand
  • Inversion
  • Reclining Hero Pose
  • Upward plank
  • Revolved triangle pose
  • Camel Pose
Continue Reading

Best Yoga Poses for Carpal Tunnel Syndrome

yoga_carpal_tunnel_syndrome

To help treat and prevent Carpal Tunnel Syndrome with yoga, you’ll need to practice poses that strengthen the flexor muscles of the forearm, says Anusara Yoga founder John Friend. The flexor muscles are on the under, or palm, side of the forearm. Depending on the severity of your condition, you may want to start with poses that bear less weight on the wrist joint. Gradually work up to more difficult poses, paying close attention to maintaining proper alignment.


Wrist Exercises

To increase the range of extension on your wrists, I teach the following postures to my Beginning Students and Private Clients


Cat-Cow

Start on all fours, bringing the wrists underneath the shoulders and the knees underneath the hips. Close your eyes. Imagine your spine as a straight line connecting the shoulders to the hips. Visualize the line extending forward through the crown of the head and backwards through the tail bone. Keep the neck the natural extension of the spine.

On the inhale: Curl toes under. Drop your belly. Gaze up toward the ceiling. Allow the movement in the spine to being from the tailbone, neck is the last part to move.

On the exhale: Release the tops of the feet to the floor. Round the spine like an angry cat. Release the head down. Gaze gently to the navel.

Repeat the Cat-Cow Stretch on each inhale and exhale, matching each movement to your own breath.


Namaskarasana (Prayer Position)

Bring your hands-palms together in Namaste (Prayer Position) in front of your chest. Keep heels of your hands together. Keep fingers pointing up.

Gently press hands down toward your waist. Keep heels of hands together, do not let them come apart; if you do, you’ll lose the wrist stretch. Hold stretch for a minute or two while focusing on your breath

As your yoga practice continues, you will gradually be able to move the wrists into deeper extension.


Salabhasana (Locust Pose)

Locust pose, also known as Salabhasana, may appear to focus on the lower body, however, if you have Carpal Tunnel or arthritis, this is a great preventer pose and helps with circulation through the arms and fingers. Locust pose also helps with fatigue, indigestion and lower back pain.

To feel the maximum benefit for Carpal Tunnel, make sure palms are face down and elbows are straight.


Upward-Facing Dog

This Urdhva Mukha Svanasana pose is one of the positions in the traditional Sun Salutation sequence. This pose is one of the most common poses in yoga, and will help strengthen wrists and increase circulation.

It should be noted that all yoga poses where the wrists and hands are used to support the body are beneficial in increasing strength and circulation for those suffering with CTS.


The postures / warm-up exercises noted above will bring awareness to your own personal level of extension in your wrists by placing the heels of your hands directly below your shoulders. It is important to realize that a set of exercises and their execution can and should be adjusted according to one’s individual needs, wishes and body type. Exercising 2 to 3 times a week should be enough to yield results within two months.

Continue Reading

Yoga Poses for Back Injury Recovery – Healing Your Back Injury with Yoga

yoga_back_injury

yoga for back injury recovery

Have you just hurt your back and don’t know how to proceed? Yoga therapist explains why working with back injury with yoga therapy is different, and more effective than other modalities you may have tried. Following the steps below, you can move from the first stage of pain and injury, right through to full, pain free functionality!

Uttanasana or Standing Forward Fold

This pose helps to bring length to the back line of the body. It is an excellent posture to lengthen the hamstrings, but it also has the potential to strain the lower back if not done correctly.

While a slight rounding of the back is fine, you want to maintain integrity of the spine. You can modify your Uttanasana by placing hands on the shin bones, or hands on one or two yoga block(s). Doing so helps to bring space into the spine whilst forward bending.


Paschimottanasana or Seated Forward Bend

Paschimottanasana is a seated forward fold that stretches the spine and hamstrings, and is typically used at the end of a practice. Like Uttanasana, there is risk of straining the lower back when it is done forcefully and without awareness of creating space.


Twisting Postures

Any twist postures (e.g., Pavritta Parsvakonasana, Ardha Matsyendrasana, etc.) should be practiced mindfully with an intention to lengthen the spine on an inhale, and twisting on the exhale with the navel drawing inwards.

Drawing the navel inwards creates core engagement, supporting the spine as it twists, minimizing the potential for injury. Students who have existing disc issues in their lower back are advised to stay away from deep twists, or to work closely with an experienced yoga instructor.


Anjaneyasana or Low Lunge Pose

The psoas is an important flexor that runs from the front of the spine and attaches to the head of the thigh bone. As a result of long periods of sitting, the psoas shortens or tightens, which then puts strain on the lower back.

If we open up the psoas, we also help bring greater freedom into the lower back, minimizing the risk of injury. Anjaneyasana or Low Lunge pose helps to stretch the hip flexors, including the psoas.


Ardha Hanumanasana or Half Splits Pose

The hamstrings run along the back of each thigh and when tight can, not only keep you from touching your toes, but also limit motion in the pelvis which can create stress across the lower back. Ardha Hanumanasana or half monkey pose/half splits is a fairly accessible posture that stretches the hamstrings and also lengthens the spine.

From Anjaneyasana, lower the hands to the mat and frame the front foot. Shift the pelvis back, so the back leg knee is below the hip, and the front leg is straight. Hands on the mat below the shoulders (or blocks, if needed). Inhale to lengthen the spine, and keep the sternum lifted as you draw forward over the front thigh. Hold for 5 to 10 breaths and repeat on the other side.


The Yoga Pose that Healed my Lower Back Injuries

Rabbit, the sasangasana, is a hard pose, one that puts pressure on the neck and constricts the throat, making it hard to breathe. It’s my favorite asana though. Well to be accurate, not really my favorite, easiest or most fun, but favorite because of how it’s healed my back.

Growing up, I had injuries from trampolines, diving, weightlifting and falling from a roof. These resulted in lower back pain. Yet through the years, I found ways to get past that stabbing sensation in my lower spine close to my tailbone. On rare occasions, if I twisted the wrong way while grabbing a bag of groceries from the back seat of my car, a lightning bolt of nerve pain shot up my back taking me to the ground.

For years, my back aggravated me and compromised my activities. To motorcycle long distances, I added a lower back support and took aspirin.

But with yoga practice, the rabbit has since fixed my back and I am in debt to my adopted bunny.


Most Common Yoga Injuries and How to Avoid Them

While most yoga injuries aren’t severe and go unreported, more serious issues do occur, including strains and sprains, fractures, dislocations, and, in rare cases, bone spurs, sciatic nerve damage, and stroke. But according to yoga experts, injuries can happen any time, in any sport, or even walking down the sidewalk — and scary injuries are rare. Most yoga injuries develop gradually over years of consistent over-stretching and misalignment. As with any physical activity, the safest approach to yoga is to learn how to practice the poses correctly and stay in tune with your body to avoid overdoing it.


Wrists

When it comes to the wrists, it’s all about leverage. Placing all of the body’s weight in the wrists when the hands are on the mat can lead to muscle and joint injuries.


Find relief

When in doubt, spread ‘em. In any pose where weight is placed on the hands (such as down dog), distribute the body’s weight through both hands by spreading them wide and pressing through the fingers. In down dog, push the hips back to decrease the angle of the wrists to the floor. In arm balances, such as crow pose, look to see that the elbows are stacked directly over the wrists, Cheng says.


Elbows

Joint pain in the elbows can result from bending them out to the sides in poses like chaturanga. While it may be easier to execute, lowering down with outward-pointing elbows can stress the joint and can also put undue stresses on the wrists.


Tuck and lower

When bending the elbows in a pose (particularly plank or chaturanga), keep the elbows tucked alongside the ribs as you bend them, and make sure the elbows’ creases face forward, Cheng says. If this is difficult (yes, it’s a serious test of triceps strength!), begin with the knees on the floor. Remember, you can always work up to the unmodified version through regular practice.


Shoulders

Beware the shrug. By raising the shoulders up toward the ears (like when moving into up dog), yogis stop using the supporting muscles in the arms, shoulders, and neck. Shrugging also compresses the shoulders, which can cause muscle injuries, Cheng says. Even worse: It’s easy to injure the shoulder girdle or rotator cuff (and even dislocate the joint) by over-extending or over-stretching.


Let go

Be careful not to pull too hard on the shoulders in stretches, and always keep the shoulders held back and down away from the ears, yoga teacher and personal trainer Jeni Livingston says.


Ribs

Twists are awesome for releasing tension, but if done improperly they can overextend or bruise the intercostal muscles (the muscles in between the ribs).


Twist, don’t shout

Lengthen upwards through the spine before twisting. Imagine that someone has a string attached to the crown of your head and is very gently pulling you up toward the ceiling. Twist to the point of feeling a stretch but not past it, even if you’re flexible, Cheng says.


Lower back

Lower back pain is the most frequently cited yoga injury, and teachers speculate that it’s likely the result of rounding through the spine in poses like forward folds and down dog. Rounding causes the spine to flex the opposite way that it’s supposed to, Livingston says, which can cause disc problems in addition to that achy feeling post-class.


Soothe the spine

Before bending, imagine lengthening the spine up and away from the hips to avoid rounding. Still struggling to stay on the straight and narrow? Try bending the knees in poses like forward folds and down dog, Livingston says, since the culprit could be tight hamstrings. During seated forward folds, try sitting on a blanket or block to take pressure off the lower back.


Hamstrings

Spend most days sitting in front of the computer, in class, or in the car? Guilty as charged. As a result, many of us have tight hamstrings, so it’s easy to pull or over-stretch them in poses like forward bends, Cheng says.


Hamper pain

Down dog and lunges are great ways to stretch the hamstrings (just remember to go slowly and work at your own pace). If you have any kind of hamstring injury, try laying off poses that extend through the back of the body and legs until the injury heals.


Hips

It’s easy to over-extend the hips’ range of motion in splits, warrior poses, and wide-legged forward folds, Cheng says, which might tear the muscles of the inner groin or inner thighs.

Get hip (to proper form): A good rule of thumb is to make sure that the toes are pointed forward in any pose where the hips are squared off in the same direction (think: warrior I). Imagine there are headlights attached to the front of the hips and that you’re trying to keep the area straight ahead of you illuminated at all times.

Knee

Knee issues can plague even experienced yogis well after class. A common culprit of pain is the cross-legged position, Livingston says. Flexibility carries from the hips first; if the hips are tight in the pose, the knees will be the first place to feel pain or tension.

Prevent the pain

For those regularly bothered by knee pain, avoid sitting in cross-legged position or full lotus for long periods unless the hips are already very flexible, Livingston says. Placing a block or rolled-up blanket under the knees in cross-legged positions can also help reduce strain. Any time the knee is bent in a standing pose (such as warriors I and II), look to see that there’s a vertical line from the bent knee to the heel, Cheng says — this ensures that the body is bearing weight properly.


Neck

Head and shoulder stands can be the worst culprits for neck pain and injury, says yoga teacher Julie Skaarup. Repeatedly and incorrectly placing pressure on the neck in poses such as shoulder stand and headstand can compress the neck and put pressure on the cervical vertebrae, resulting in joint issues and, in some cases, loss of neck flexion.

Prop it up

Have chronic neck or shoulder issues? It might be best to avoid full inversions all together, Cheng says (or attempt them only with close supervision and using props that elevate the neck away from the floor). For those who already practice the pose without props, make sure the shoulder blades are drawn down and back so they’re safely supporting the body. Most importantly, never jerk the head once you’re up in the pose, Skaarup says, because it can destabilize the body, possibly causing a fall.

Continue Reading